
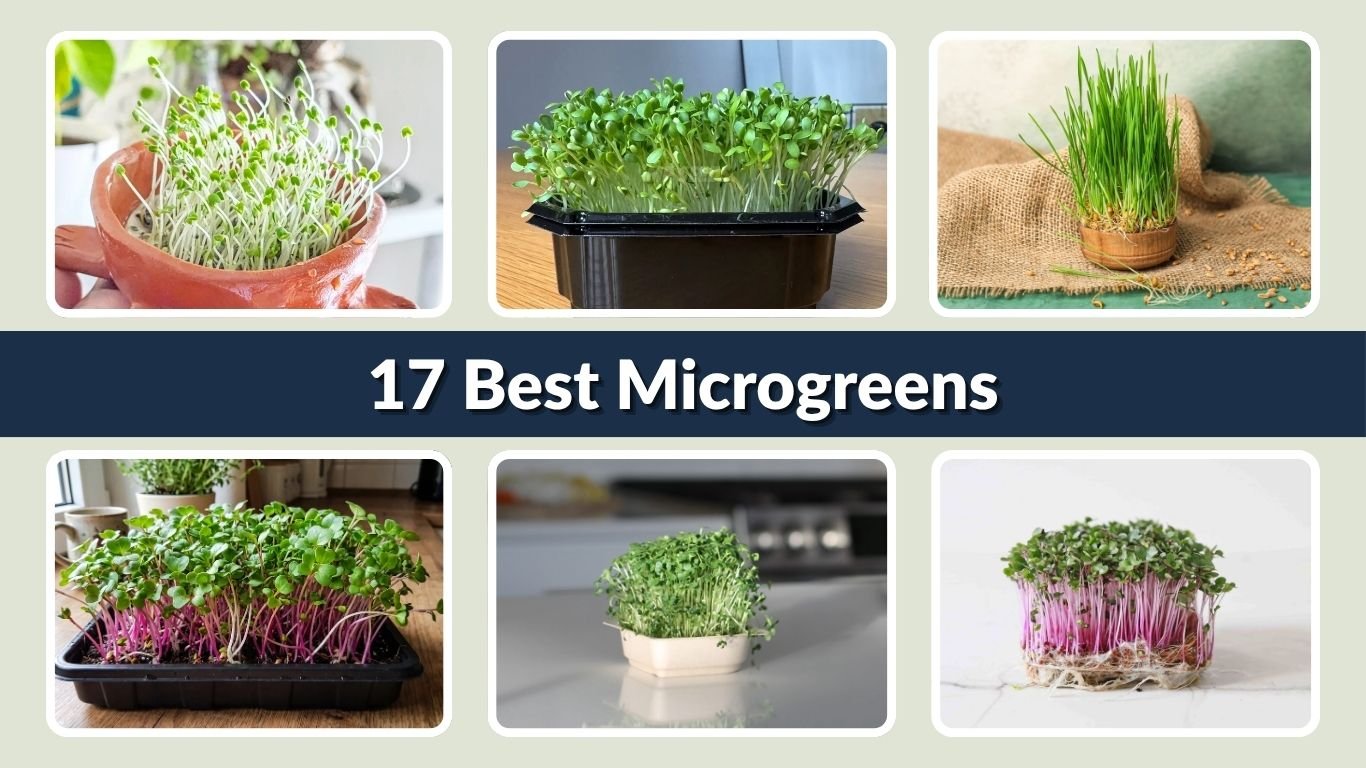
Growing microgreens at home is a simple and rewarding way to enjoy fresh, nutritious greens throughout the year. These fast-growing plants require minimal space, basic equipment, and little maintenance, making them perfect for beginners. From spicy radish and tender broccoli to crunchy sunflower and sweet pea shoots, these 17 best microgreens for beginners are easy to grow indoors and offer delicious flavors for everyday meals.
1. Radish Microgreens
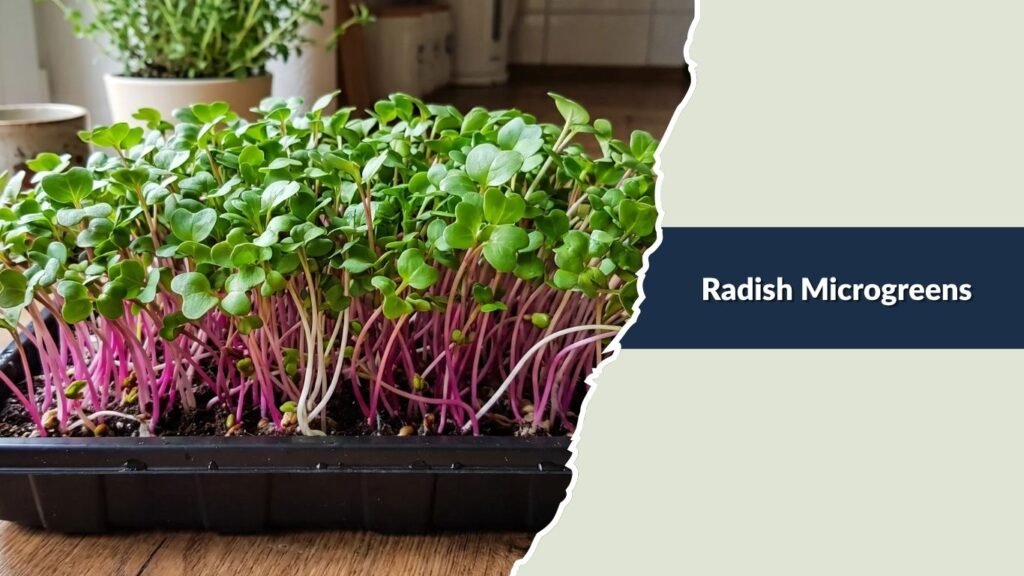
Radish microgreens are among the best microgreens for beginners because they grow quickly, require minimal maintenance, and produce a flavorful harvest. These tiny greens have tender stems, bright green leaves, and a slightly spicy, peppery taste similar to mature radishes. They are rich in nutrients, including vitamins C and K, making them a healthy addition to everyday meals. Radish microgreens grow well indoors throughout the year and typically become ready for harvesting within 7–10 days. Their fast germination and reliable growth make them an excellent choice for first-time indoor gardeners.
How to Grow Radish Microgreens Indoors
Growing radish microgreens indoors is simple and requires only a few basic supplies. Start with a shallow growing tray filled with approximately 1–2 inches of moist seed-starting mix or coco coir. Spread untreated radish seeds evenly across the surface, keeping them close together without excessive overlap. Mist the seeds gently with water and cover the tray for approximately 2–3 days to encourage germination. Once the seeds sprout, remove the cover and place the tray near a bright window or under an LED grow light. Maintain consistent moisture and provide good airflow to encourage healthy growth.
Ideal Growing Conditions
- Light: Provide 12–16 hours of bright light daily using a grow light or a suitable sunny window.
- Temperature: Maintain temperatures between 60–75°F (16–24°C) for healthy growth.
- Watering: Keep the growing medium consistently moist but never waterlogged.
- Growing Medium: Use coco coir or a lightweight, well-draining seed-starting mix.
- Germination Time: Seeds usually germinate within 2–4 days under suitable conditions.
- Harvesting Time: Harvest approximately 7–10 days after sowing, depending on growing conditions.
Harvesting and Maintenance Tips
Harvest radish microgreens when they reach approximately 2–3 inches tall and their first seed leaves are fully developed. Use clean, sharp scissors to cut the stems just above the growing medium. Avoid pulling the plants out by their roots, as this can introduce soil particles into the harvested greens. Water gently, preferably from the bottom of the tray, to reduce excess moisture on the leaves and minimize mold problems. After harvesting, rinse the greens if needed, dry them thoroughly, and store them in a clean container in the refrigerator. Fresh radish microgreens taste delicious in salads, sandwiches, wraps, and homemade dishes.
2. Broccoli Microgreens
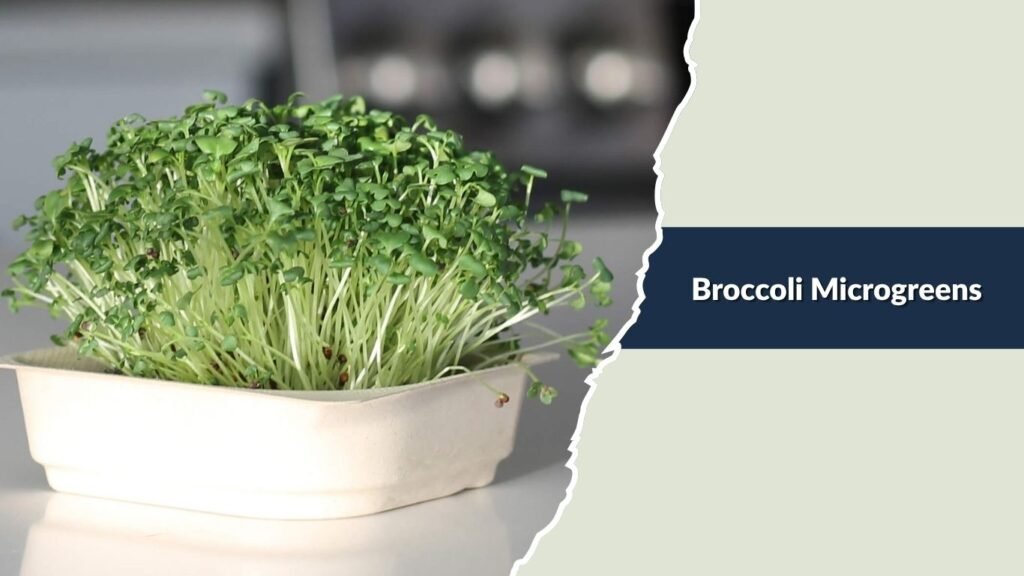
Broccoli microgreens are among the healthiest and easiest microgreens for beginners to grow indoors. These tender greens have small, bright green leaves, delicate stems, and a mild, slightly earthy flavor. They contain valuable nutrients, including vitamins C and K, along with glucosinolates that can produce beneficial compounds such as sulforaphane. Broccoli microgreens are popular because they grow quickly, require little space, and thrive in simple indoor growing setups. They typically become ready for harvesting within 8–12 days, making them an excellent choice for beginners interested in growing fresh, nutritious greens at home.
How to Grow Broccoli Microgreens Indoors
Growing broccoli microgreens indoors requires a shallow growing tray, quality seeds, and a suitable growing medium. Begin by filling the tray with approximately 1–2 inches of moist seed-starting mix or coco coir. Spread untreated broccoli seeds evenly across the surface without overcrowding them. Gently mist the seeds with water and cover the tray for 2–3 days to encourage germination. Once the seeds begin sprouting, remove the cover and place the tray near a bright window or beneath an LED grow light. Maintain consistent moisture and good airflow throughout the growing process. Broccoli microgreens generally grow evenly and develop attractive green leaves under suitable conditions.
Ideal Growing Conditions
- Light: Provide approximately 12–16 hours of bright light daily using an LED grow light or a sunny window.
- Temperature: Maintain temperatures between 60–75°F (16–24°C) for healthy growth.
- Watering: Keep the growing medium consistently moist without allowing standing water.
- Growing Medium: Use lightweight seed-starting soil or well-draining coco coir.
- Germination Time: Seeds typically germinate within 2–4 days under favorable conditions.
- Harvesting Time: Broccoli microgreens are generally ready to harvest within 8–12 days after sowing.
Harvesting and Maintenance Tips
Harvest broccoli microgreens when they reach approximately 2–3 inches tall and their first seed leaves have fully opened. Use clean, sharp scissors to cut the stems just above the growing medium. Avoid disturbing the roots or introducing soil into the harvested greens. Water from the bottom whenever possible to keep the leaves relatively dry and reduce mold problems. Ensure proper airflow and avoid excessive seed density to encourage strong, healthy growth. After harvesting, gently rinse the microgreens if necessary, dry them thoroughly, and refrigerate them in a clean container. Broccoli microgreens make a delicious addition to salads, sandwiches, wraps, and healthy homemade meals.
3. Sunflower Microgreens
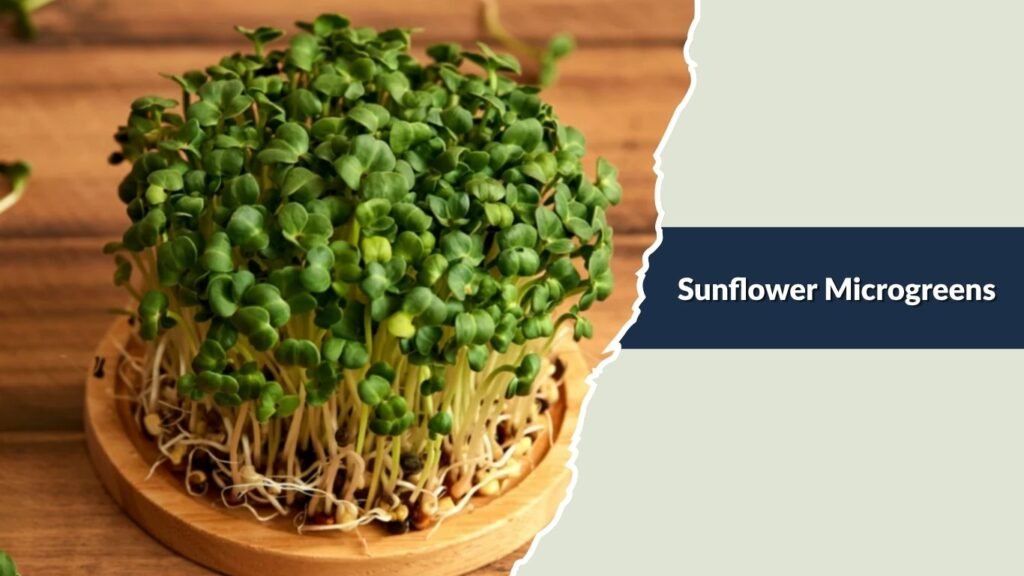
Sunflower microgreens are an excellent choice for beginners because they produce thick, crunchy stems, attractive green leaves, and a delicious nutty flavor. Unlike many smaller microgreens, sunflower greens have a satisfying texture that makes them particularly enjoyable in fresh salads and sandwiches. They provide nutrients such as vitamin E, protein, and minerals, making them a nutritious addition to a balanced diet. Sunflower microgreens are relatively easy to grow indoors when provided with proper moisture, lighting, and airflow. They generally become ready for harvesting within 8–12 days, offering beginners a rewarding growing experience with a generous harvest.
How to Grow Sunflower Microgreens Indoors
Start by choosing untreated, food-grade black oil sunflower seeds intended for sprouting or microgreen production. Soak the seeds in clean water for approximately 8–12 hours to encourage faster germination. Fill a shallow growing tray with 1–2 inches of moist seed-starting mix or coco coir, then spread the drained seeds evenly across the surface. Cover the tray with another tray or suitable cover for approximately 2–4 days while the seeds germinate. Once the seedlings begin growing, remove the cover and place them under bright light. Maintain moderate moisture and good air circulation to prevent mold development. As the plants grow, their thick stems and rounded green leaves create a dense, attractive crop.
Ideal Growing Conditions
- Light: Provide 12–16 hours of bright light daily using an LED grow light or a suitable sunny window.
- Temperature: Maintain temperatures around 65–75°F (18–24°C) for consistent growth.
- Watering: Keep the growing medium evenly moist, preferably using bottom watering.
- Growing Medium: Use well-draining seed-starting mix or coco coir to support healthy root development.
- Germination Time: Sunflower seeds usually germinate within 2–4 days under suitable conditions.
- Harvesting Time: Harvest approximately 8–12 days after sowing, before the true leaves become well developed.
Harvesting and Maintenance Tips
Harvest sunflower microgreens when they reach approximately 3–4 inches tall and their first seed leaves are fully opened. Use clean scissors to cut the stems slightly above the growing medium. Remove any remaining seed hulls from the leaves before eating. Sunflower microgreens benefit from good airflow because their large seeds and dense growth can encourage mold when moisture becomes excessive. Avoid overwatering and remove damaged or decaying seedlings promptly. After harvesting, rinse the greens with clean water if needed, dry them thoroughly, and store them in the refrigerator. Their crunchy texture and mild nutty flavor make them perfect for salads, sandwiches, wraps, and fresh vegetable bowls.
4. Pea Shoot Microgreens
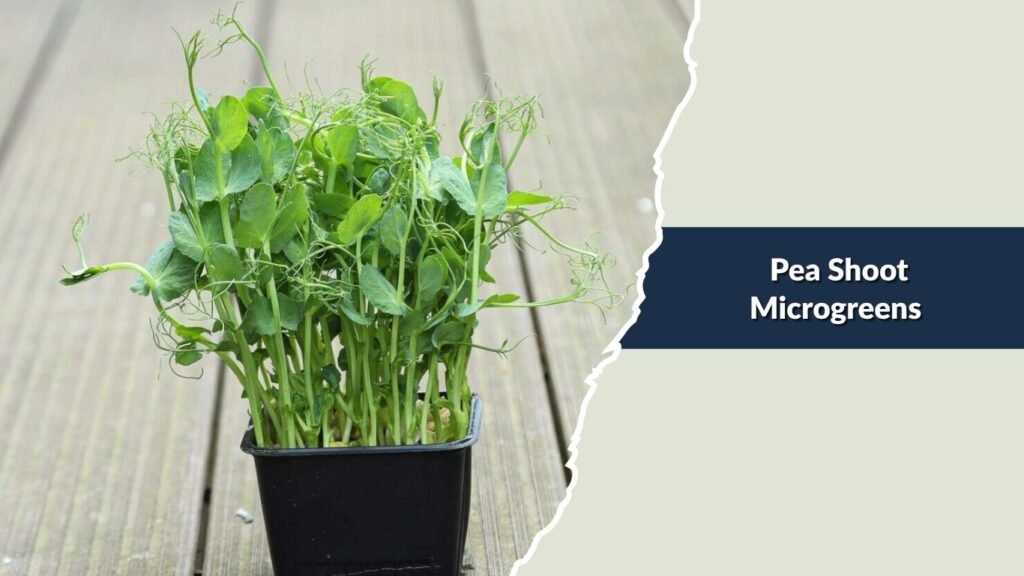
Pea shoot microgreens are among the best microgreens for beginners because they grow quickly, produce generous harvests, and require minimal gardening experience. These tender greens have bright green leaves, delicate tendrils, and crisp stems with a sweet, fresh flavor similar to garden peas. They contain valuable nutrients, including vitamins C and K, making them a nutritious addition to everyday meals. Pea shoots grow well indoors and are particularly suitable for small growing spaces. They typically become ready for harvesting within 10–14 days, making them an excellent choice for beginners who want fresh, flavorful greens throughout the year.
How to Grow Pea Shoot Microgreens Indoors
Growing pea shoot microgreens indoors is simple with a shallow growing tray, quality seeds, and a suitable growing medium. Start by soaking untreated pea seeds in clean water for approximately 8–12 hours to encourage germination. Fill a growing tray with 1–2 inches of moist seed-starting mix or coco coir. Spread the soaked seeds evenly across the surface without creating excessive overlapping layers. Cover the tray for approximately 2–4 days until the seeds begin sprouting. Once germination occurs, remove the cover and place the tray near a bright window or beneath an LED grow light. Maintain consistent moisture and provide good airflow to encourage healthy stem and leaf development.
Ideal Growing Conditions
- Light: Provide approximately 12–16 hours of bright light daily using an LED grow light or a suitable sunny window.
- Temperature: Maintain temperatures between 60–75°F (16–24°C) for healthy growth.
- Watering: Keep the growing medium consistently moist without allowing water to accumulate.
- Growing Medium: Use lightweight seed-starting soil or well-draining coco coir.
- Germination Time: Pea seeds generally germinate within 2–5 days under favorable conditions.
- Harvesting Time: Pea shoot microgreens are usually ready for harvesting within 10–14 days after sowing.
Harvesting and Maintenance Tips
Harvest pea shoot microgreens when they reach approximately 3–5 inches tall and develop several attractive green leaves. Use clean, sharp scissors to cut the stems above the growing medium. For varieties capable of regrowth, leaving a few lower leaves may encourage a smaller second harvest. Avoid overwatering because excessive moisture can encourage mold and damage developing roots. Provide adequate lighting to prevent weak, stretched stems. After harvesting, gently rinse the pea shoots if necessary, dry them thoroughly, and store them in a clean container in the refrigerator. Their sweet flavor and crunchy texture make them delicious in salads, sandwiches, stir-fries, and vegetable bowls.
5. Arugula Microgreens
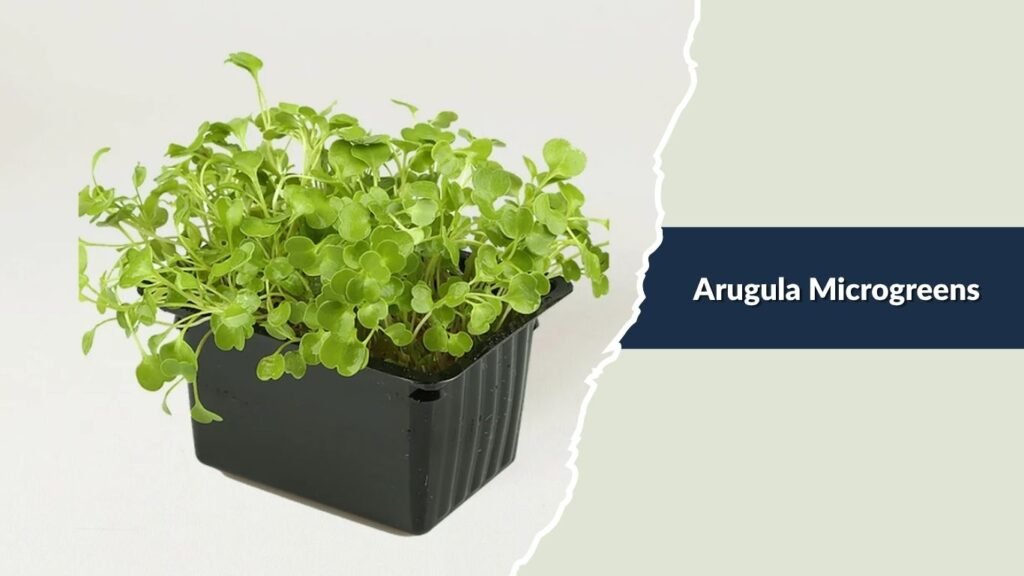
Arugula microgreens are an excellent choice for beginners who enjoy fresh, flavorful greens with a slightly spicy taste. These delicate microgreens feature small green leaves, tender stems, and a distinctive peppery flavor similar to mature arugula. They contain important nutrients, including vitamins A, C, and K, along with beneficial plant compounds. Arugula microgreens grow quickly indoors and require only a small growing area, making them suitable for kitchens, balconies, and indoor gardening shelves. They generally become ready for harvesting within 8–12 days, offering beginners a simple and rewarding way to grow nutritious greens at home.
How to Grow Arugula Microgreens Indoors
Start by preparing a shallow growing tray filled with approximately 1–2 inches of moist seed-starting mix or coco coir. Sprinkle untreated arugula seeds evenly across the surface, leaving enough space to prevent excessive overcrowding. Unlike larger seeds, arugula seeds do not require soaking before planting. Gently mist the seeds with clean water and cover the tray for approximately 2–3 days to encourage germination. Once the seedlings begin emerging, remove the cover and position the tray beneath an LED grow light or near a bright window. Maintain consistent moisture and good air circulation throughout the growing period. Arugula seedlings develop quickly, producing attractive green leaves and slender stems.
Ideal Growing Conditions
- Light: Provide approximately 12–16 hours of bright light daily using an LED grow light or a sunny window.
- Temperature: Maintain temperatures between 60–70°F (16–21°C) for healthy, consistent growth.
- Watering: Keep the growing medium lightly moist without creating soggy conditions.
- Growing Medium: Use lightweight seed-starting mix or coco coir with good drainage.
- Germination Time: Arugula seeds typically germinate within 2–4 days under suitable conditions.
- Harvesting Time: Arugula microgreens are generally ready to harvest within 8–12 days after sowing.
Harvesting and Maintenance Tips
Harvest arugula microgreens when they reach approximately 2–3 inches tall and their first seed leaves have fully developed. Use clean scissors to cut the stems just above the growing medium. Avoid allowing the plants to become overly mature because their texture and flavor may change as true leaves develop. Keep the growing tray in a well-ventilated location and avoid excessive watering to reduce the risk of mold. Provide consistent lighting to encourage compact, healthy growth. After harvesting, gently rinse the greens if needed, dry them thoroughly, and refrigerate them in a clean container. Their peppery flavor makes them an excellent addition to salads, sandwiches, wraps, and homemade pizza.
6. Mustard Microgreens
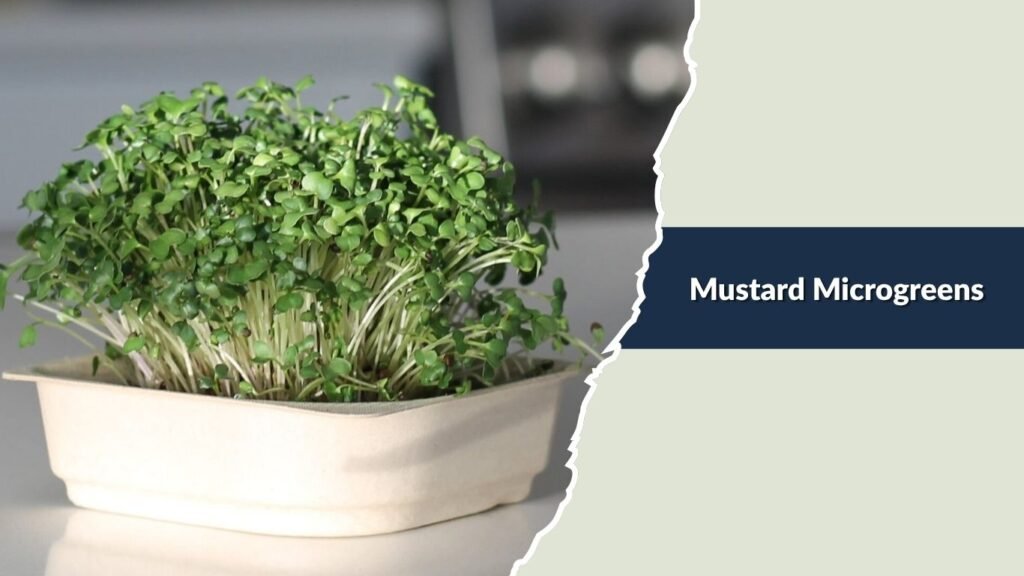
Mustard microgreens are among the best microgreens for beginners because they grow quickly, require minimal maintenance, and offer a distinctive spicy flavor. These tender greens feature delicate stems, bright green leaves, and a sharp, peppery taste similar to mature mustard greens. They contain valuable nutrients, including vitamins A, C, and K, along with beneficial plant compounds. Mustard microgreens grow successfully indoors with basic equipment and consistent care. They typically become ready for harvesting within 7–12 days, making them an excellent choice for beginners who want to enjoy fresh, flavorful greens without waiting several weeks.
How to Grow Mustard Microgreens Indoors
Start by preparing a shallow growing tray filled with approximately 1–2 inches of moist seed-starting mix or coco coir. Sprinkle untreated mustard seeds evenly across the surface, avoiding excessive overcrowding. Mustard seeds generally do not require soaking before planting. Gently mist the seeds with clean water and cover the tray for approximately 2–3 days to encourage germination. Once the seedlings begin emerging, remove the cover and position the tray near a bright window or beneath an LED grow light. Maintain consistent moisture and good air circulation throughout the growing process. Under suitable conditions, mustard microgreens develop quickly and produce attractive green leaves with tender, flavorful stems.
Ideal Growing Conditions
- Light: Provide approximately 12–16 hours of bright light daily using an LED grow light or a suitable sunny window.
- Temperature: Maintain temperatures between 60–75°F (16–24°C) for healthy growth.
- Watering: Keep the growing medium evenly moist without allowing excessive water accumulation.
- Growing Medium: Use lightweight seed-starting soil or well-draining coco coir.
- Germination Time: Mustard seeds typically germinate within 2–4 days under favorable conditions.
- Harvesting Time: Mustard microgreens are generally ready to harvest within 7–12 days after sowing.
Harvesting and Maintenance Tips
Harvest mustard microgreens when they reach approximately 2–3 inches tall and their first seed leaves are fully developed. Use clean, sharp scissors to cut the stems slightly above the growing medium. Avoid pulling the seedlings from the tray because this can introduce soil particles into the harvested greens. Water gently from the bottom whenever possible to reduce moisture buildup on the leaves. Maintain good airflow and avoid overcrowding to minimize mold problems. After harvesting, rinse the greens if necessary, dry them thoroughly, and store them in a clean container in the refrigerator. Their spicy flavor makes them delicious in salads, sandwiches, wraps, and homemade vegetable dishes.
7. Kale Microgreens
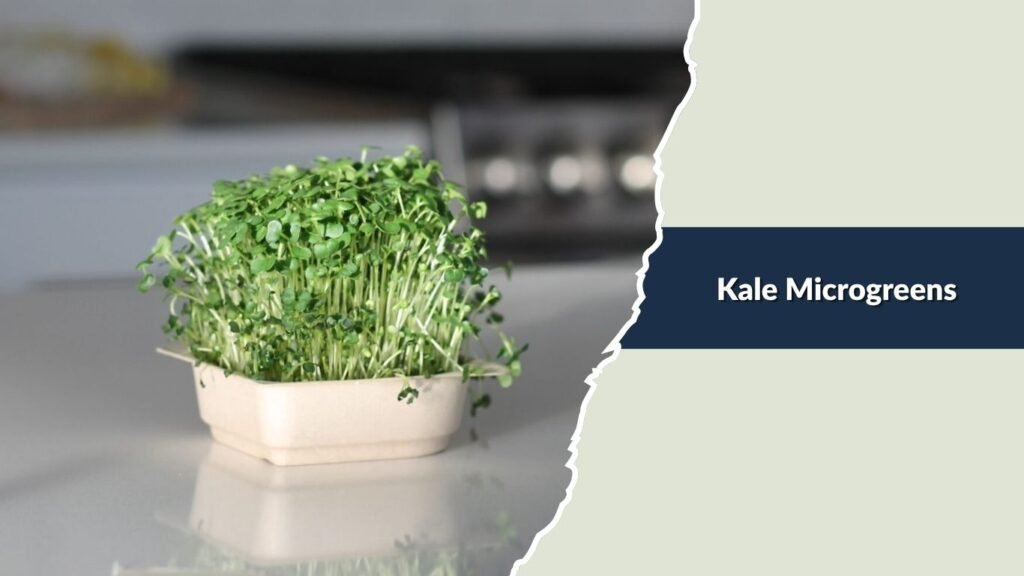
Kale microgreens are an excellent choice for beginners because they are easy to grow, require little space, and provide a nutritious harvest. These delicate greens have small, bright green leaves, slender stems, and a mild, slightly earthy flavor. Depending on the variety, some kale microgreens may also develop attractive purple or reddish stems. They contain valuable nutrients, including vitamins A, C, and K, along with beneficial antioxidants. Kale microgreens grow well indoors throughout the year and generally become ready for harvesting within 8–12 days. Their simple growing requirements make them ideal for first-time gardeners interested in producing fresh greens at home.
How to Grow Kale Microgreens Indoors
Begin by filling a shallow growing tray with approximately 1–2 inches of moist seed-starting mix or coco coir. Spread untreated kale seeds evenly across the surface, leaving enough space to prevent excessive crowding. Kale seeds do not usually require soaking before planting. Gently mist the seeds with clean water and cover the tray for approximately 2–3 days to encourage germination. Once the seedlings begin sprouting, remove the cover and place the tray near a sunny window or beneath an LED grow light. Maintain consistent moisture and adequate airflow throughout the growing period. Under suitable conditions, kale microgreens develop tender stems and attractive green leaves that are perfect for harvesting.
Ideal Growing Conditions
- Light: Provide approximately 12–16 hours of bright light daily using an LED grow light or a suitable sunny window.
- Temperature: Maintain temperatures between 60–75°F (16–24°C) for consistent growth.
- Watering: Keep the growing medium consistently moist without creating waterlogged conditions.
- Growing Medium: Use lightweight seed-starting mix or well-draining coco coir.
- Germination Time: Kale seeds typically germinate within 2–4 days under suitable conditions.
- Harvesting Time: Kale microgreens are generally ready for harvesting within 8–12 days after sowing.
Harvesting and Maintenance Tips
Harvest kale microgreens when they reach approximately 2–3 inches tall and their first seed leaves have fully opened. Use clean, sharp scissors to cut the stems just above the growing medium. Avoid pulling the plants out by their roots to keep the harvested greens free from growing medium. Water from the bottom whenever possible to reduce excessive moisture around the leaves and lower the risk of mold. Provide consistent lighting to encourage compact growth and prevent weak, elongated stems. After harvesting, gently rinse the greens if necessary, dry them thoroughly, and refrigerate them in a clean container. Their mild flavor makes them an excellent addition to salads, sandwiches, smoothies, and fresh vegetable bowls.
8. Cabbage Microgreens
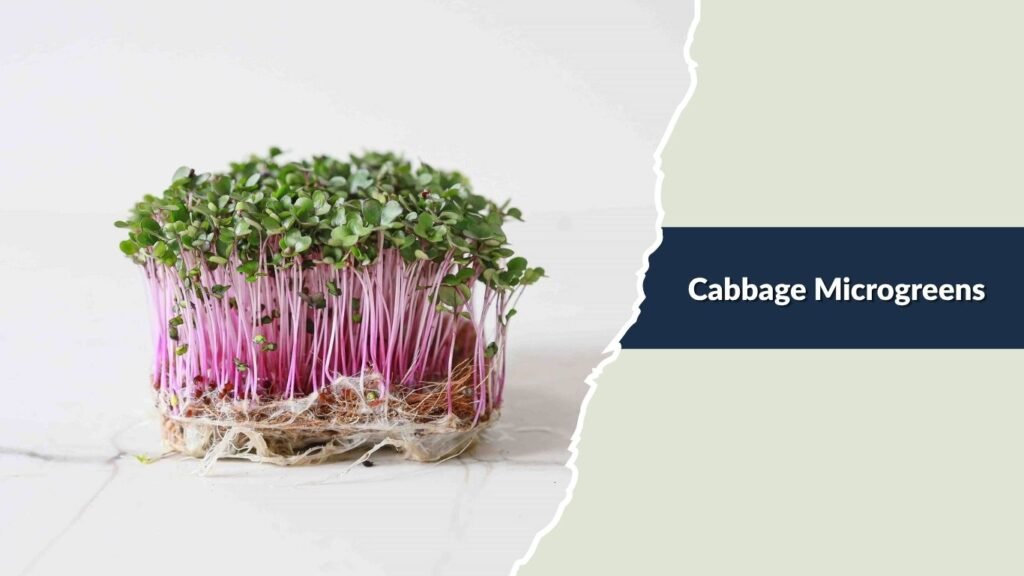
Cabbage microgreens are among the best microgreens for beginners because they grow quickly, require minimal maintenance, and produce a nutritious harvest. These delicate greens have tender stems, small green leaves, and a mild, slightly sweet flavor similar to mature cabbage. Red cabbage varieties also develop attractive purple stems that add beautiful color to salads and other dishes. Cabbage microgreens contain valuable nutrients, including vitamins C and K, along with beneficial plant compounds. They grow successfully indoors throughout the year and typically become ready for harvesting within 8–12 days, making them an excellent choice for first-time indoor gardeners.
How to Grow Cabbage Microgreens Indoors
Start by preparing a shallow growing tray filled with approximately 1–2 inches of moist seed-starting mix or coco coir. Sprinkle untreated cabbage seeds evenly across the surface, avoiding excessive overcrowding. Cabbage seeds generally do not require soaking before planting. Gently mist the seeds with clean water and cover the tray for approximately 2–3 days to encourage germination. Once the seedlings begin emerging, remove the cover and place the tray near a bright window or beneath an LED grow light. Maintain consistent moisture and provide adequate air circulation throughout the growing process. Under suitable conditions, cabbage microgreens develop healthy stems and attractive leaves that are ready for harvesting within a short period.
Ideal Growing Conditions
- Light: Provide approximately 12–16 hours of bright light daily using an LED grow light or a suitable sunny window.
- Temperature: Maintain temperatures between 60–75°F (16–24°C) for healthy growth.
- Watering: Keep the growing medium evenly moist without allowing water to accumulate.
- Growing Medium: Use lightweight seed-starting soil or well-draining coco coir.
- Germination Time: Cabbage seeds typically germinate within 2–4 days under favorable conditions.
- Harvesting Time: Cabbage microgreens are generally ready to harvest within 8–12 days after sowing.
Harvesting and Maintenance Tips
Harvest cabbage microgreens when they reach approximately 2–3 inches tall and their first seed leaves have fully opened. Use clean, sharp scissors to cut the stems slightly above the growing medium. Avoid pulling the seedlings from the tray because this can introduce soil particles into the harvested greens. Water gently from the bottom whenever possible to reduce excessive moisture around the leaves. Maintain proper airflow and avoid overcrowding to minimize mold problems. After harvesting, rinse the greens if necessary, dry them thoroughly, and store them in a clean container in the refrigerator. Their mild flavor and tender texture make them delicious in salads, sandwiches, wraps, and fresh vegetable bowls.
9. Red Clover Microgreens
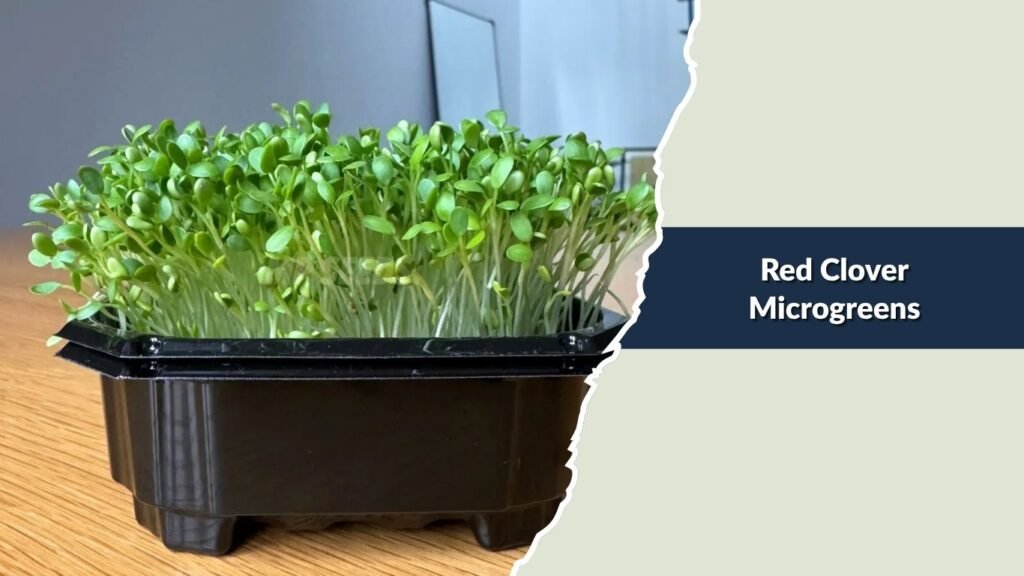
Red clover microgreens are an excellent choice for beginners because they are easy to grow, require very little space, and offer a mild, refreshing flavor. These delicate greens feature slender stems, small green leaves, and a slightly sweet, grassy taste. They contain nutrients such as vitamins and minerals, along with naturally occurring plant compounds. Red clover microgreens are particularly suitable for indoor growing because their small seeds germinate quickly and do not require complicated equipment. They generally become ready for harvesting within 8–12 days, making them a rewarding option for beginners who want to grow fresh greens in small indoor spaces.
How to Grow Red Clover Microgreens Indoors
Begin by filling a shallow growing tray with approximately 1–2 inches of moist seed-starting mix or coco coir. Spread untreated red clover seeds evenly across the surface, making sure they are not excessively crowded. Soaking is generally unnecessary when growing red clover as microgreens in a moist growing medium. Gently mist the seeds with clean water and cover the tray for approximately 2–3 days to encourage germination. Once the seedlings begin sprouting, remove the cover and place the tray under an LED grow light or near a bright window. Maintain consistent moisture and adequate airflow to encourage healthy growth. The seedlings gradually develop slender stems and small, attractive green leaves.
Ideal Growing Conditions
- Light: Provide approximately 12–16 hours of bright light daily using an LED grow light or a suitable sunny window.
- Temperature: Maintain temperatures between 60–75°F (16–24°C) for consistent growth.
- Watering: Keep the growing medium lightly moist without creating soggy conditions.
- Growing Medium: Use lightweight seed-starting mix or well-draining coco coir.
- Germination Time: Red clover seeds typically germinate within 2–4 days under suitable conditions.
- Harvesting Time: Red clover microgreens are generally ready for harvesting within 8–12 days after sowing.
Harvesting and Maintenance Tips
Harvest red clover microgreens when they reach approximately 2–3 inches tall and develop healthy green seed leaves. Use clean scissors to cut the stems just above the growing medium, keeping the harvested greens free from soil particles. Avoid excessive watering because dense, moist seedlings can become vulnerable to mold and other growing problems. Provide adequate lighting to encourage strong, compact stems and maintain good airflow around the tray. Use seeds specifically intended for edible sprouts or microgreens, and follow careful hygiene practices because raw microgreens can carry harmful bacteria. After harvesting, gently rinse the greens, dry them thoroughly, and refrigerate them promptly. Their mild flavor makes them suitable for salads, sandwiches, wraps, and fresh vegetable dishes.
10. Alfalfa Microgreens
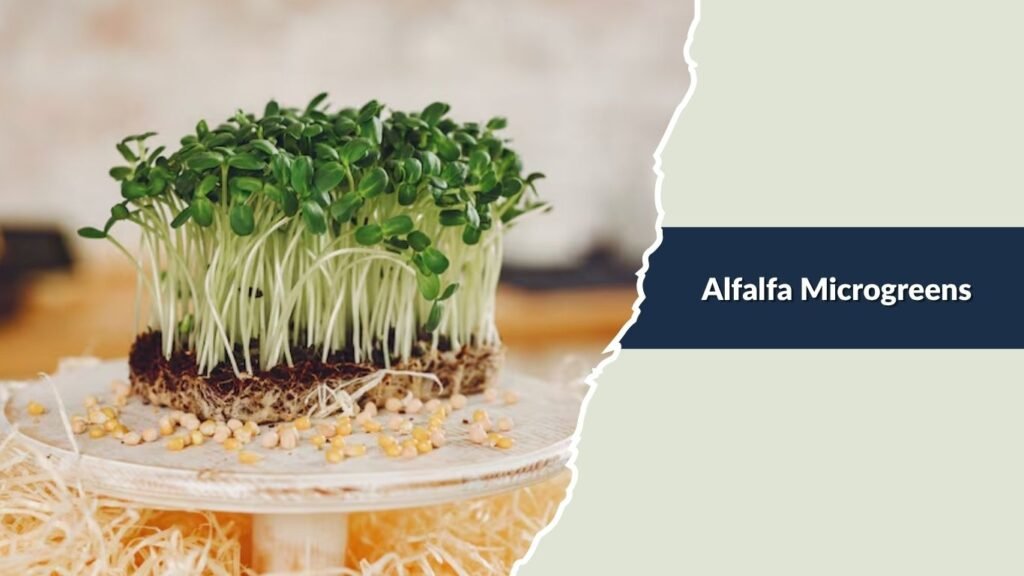
Alfalfa microgreens are among the best microgreens for beginners because they grow quickly, require little maintenance, and have a mild, refreshing flavor. These delicate greens feature thin stems, small green leaves, and a slightly sweet, grassy taste. They contain valuable nutrients, including vitamins K and C, along with several minerals and beneficial plant compounds. Alfalfa microgreens grow well indoors with basic equipment and require very little space. They typically become ready for harvesting within 8–12 days, making them an excellent choice for beginners interested in growing fresh, nutritious greens at home.
How to Grow Alfalfa Microgreens Indoors
Start by preparing a shallow growing tray filled with approximately 1–2 inches of moist seed-starting mix or coco coir. Sprinkle untreated alfalfa seeds evenly across the surface, avoiding excessive overcrowding. Alfalfa seeds generally do not require soaking when grown in a moist growing medium. Gently mist the seeds with clean water and cover the tray for approximately 2–3 days to encourage germination. Once the seedlings begin emerging, remove the cover and place the tray near a bright window or beneath an LED grow light. Maintain consistent moisture and provide adequate air circulation throughout the growing period. Under suitable conditions, alfalfa microgreens develop delicate stems and attractive green leaves.
Ideal Growing Conditions
- Light: Provide approximately 12–16 hours of bright light daily using an LED grow light or a suitable sunny window.
- Temperature: Maintain temperatures between 60–75°F (16–24°C) for healthy growth.
- Watering: Keep the growing medium consistently moist without creating waterlogged conditions.
- Growing Medium: Use lightweight seed-starting soil or well-draining coco coir.
- Germination Time: Alfalfa seeds typically germinate within 2–4 days under favorable conditions.
- Harvesting Time: Alfalfa microgreens are generally ready to harvest within 8–12 days after sowing.
Harvesting and Maintenance Tips
Harvest alfalfa microgreens when they reach approximately 2–3 inches tall and develop healthy green seed leaves. Use clean, sharp scissors to cut the stems slightly above the growing medium. Avoid pulling the seedlings from the tray because this can introduce soil particles into the harvested greens. Water gently from the bottom whenever possible to reduce excessive moisture around the leaves. Maintain proper airflow and avoid overcrowding to minimize mold problems. Use seeds specifically intended for edible microgreens, since alfalfa seeds and seedlings can carry harmful bacteria. After harvesting, refrigerate the greens promptly and wash them before use, recognizing that washing does not eliminate all foodborne illness risks. Their mild flavor makes them suitable for salads, sandwiches, wraps, and fresh vegetable dishes.
11. Wheatgrass Microgreens
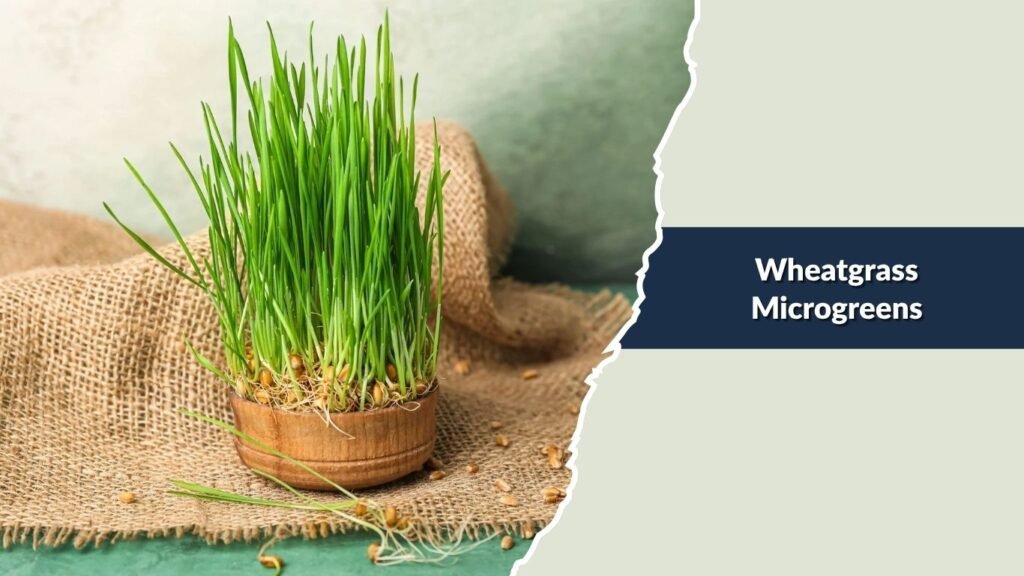
Wheatgrass is an excellent choice for beginners because it grows quickly, requires minimal equipment, and produces attractive, bright green shoots. Unlike many other microgreens, wheatgrass has long, narrow, grass-like leaves and a distinctly earthy, slightly sweet flavor. It contains nutrients such as vitamins A, C, and E, along with chlorophyll and other naturally occurring plant compounds. Wheatgrass is commonly grown indoors for juicing and blending into smoothies rather than being eaten whole. It typically becomes ready for harvesting within 7–12 days, making it a rewarding option for beginners who want to explore indoor microgreen gardening.
How to Grow Wheatgrass Microgreens Indoors
Begin by selecting untreated wheat berries intended for sprouting or edible microgreen production. Soak the seeds in clean water for approximately 8–12 hours to encourage germination. Prepare a shallow growing tray filled with 1–2 inches of moist seed-starting mix or coco coir. Spread the soaked wheat berries evenly across the surface, keeping them close together without creating thick overlapping layers. Cover the tray for approximately 2–3 days until the seeds begin sprouting. Once the shoots emerge, remove the cover and position the tray near a bright window or beneath an LED grow light. Maintain consistent moisture and adequate air circulation to encourage healthy, upright growth.
Ideal Growing Conditions
- Light: Provide approximately 12–16 hours of bright light daily using an LED grow light or a suitable sunny window.
- Temperature: Maintain temperatures between 60–75°F (16–24°C) for healthy growth.
- Watering: Keep the growing medium evenly moist without allowing standing water.
- Growing Medium: Use lightweight seed-starting soil or well-draining coco coir.
- Germination Time: Wheat berries typically germinate within 2–4 days under suitable conditions.
- Harvesting Time: Wheatgrass is generally ready to harvest within 7–12 days after sowing.
Harvesting and Maintenance Tips
Harvest wheatgrass when the shoots reach approximately 5–7 inches tall and display a vibrant green appearance. Use clean, sharp scissors to cut the grass slightly above the growing medium. Avoid harvesting discolored or moldy shoots, as these may indicate unhealthy growing conditions. Water from the bottom whenever possible and maintain good airflow to prevent excessive moisture buildup. Wheatgrass may produce a second harvest, although regrowth is often less productive than the first cutting. After harvesting, wash the grass thoroughly and use it promptly for juicing or blending. Store unused wheatgrass in a clean container in the refrigerator to maintain freshness.
12. Basil Microgreens
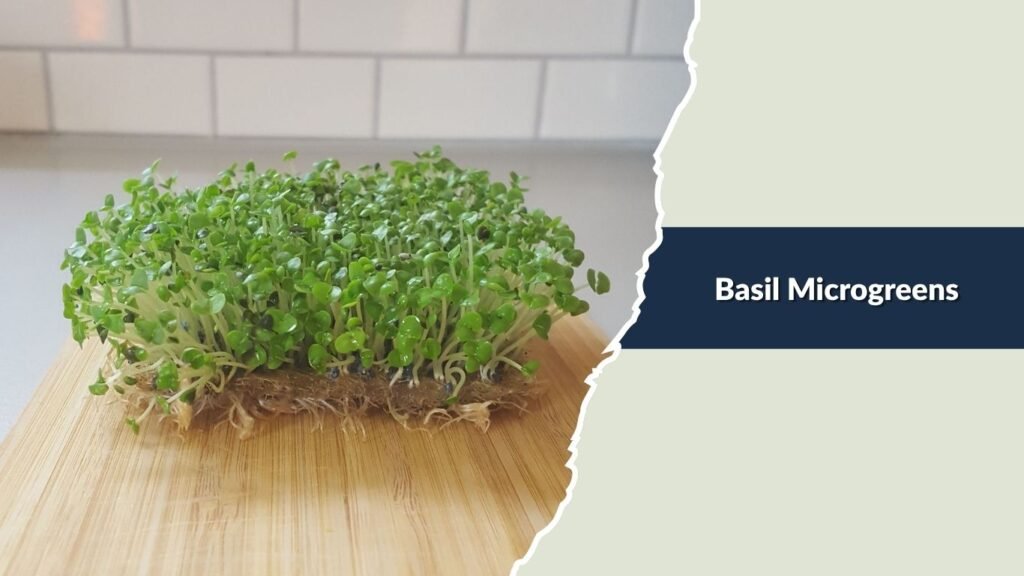
Basil microgreens are an excellent choice for beginners who want to grow flavorful and aromatic greens indoors. These delicate microgreens feature small, bright green leaves, tender stems, and a sweet, slightly peppery flavor similar to mature basil. They contain valuable nutrients, including vitamins A, C, and K, along with beneficial plant compounds. Basil microgreens are particularly popular because they add fresh flavor to salads, sandwiches, and homemade dishes. Although they grow slightly slower than some other microgreens, they require minimal equipment and generally become ready for harvesting within 14–21 days, making them a rewarding choice for indoor gardeners.
How to Grow Basil Microgreens Indoors
Start by preparing a shallow growing tray filled with approximately 1–2 inches of moist seed-starting mix or coco coir. Sprinkle untreated basil seeds evenly across the surface, leaving enough space to prevent excessive overcrowding. Basil seeds develop a gelatinous coating when exposed to water, so soaking them before planting is unnecessary. Gently mist the seeds with clean water and keep the tray covered briefly with a breathable or loose-fitting cover to maintain moisture during germination. Once the seedlings emerge, place the tray beneath an LED grow light or near a bright window. Maintain consistent moisture and warm temperatures to encourage healthy growth. Avoid excessive watering because basil seedlings can be sensitive to overly wet conditions.
Ideal Growing Conditions
- Light: Provide approximately 12–16 hours of bright light daily using an LED grow light or a suitable sunny window.
- Temperature: Maintain temperatures between 70–80°F (21–27°C) for healthy growth.
- Watering: Keep the growing medium consistently moist without creating waterlogged conditions.
- Growing Medium: Use lightweight seed-starting soil or well-draining coco coir.
- Germination Time: Basil seeds typically germinate within 4–7 days under favorable conditions.
- Harvesting Time: Basil microgreens are generally ready to harvest within 14–21 days after sowing.
Harvesting and Maintenance Tips
Harvest basil microgreens when they reach approximately 2–3 inches tall and their first seed leaves are fully developed. Use clean, sharp scissors to cut the stems slightly above the growing medium. Avoid pulling the plants from the tray because this can introduce soil particles into the harvested greens. Water gently from the bottom whenever possible to reduce moisture buildup around delicate leaves. Maintain warm temperatures and adequate airflow to prevent mold and encourage healthy growth. After harvesting, gently rinse the greens if necessary, dry them thoroughly, and refrigerate them in a clean container. Their aromatic flavor makes them a delicious addition to pasta, salads, sandwiches, and homemade pizza.
13. Beet Microgreens
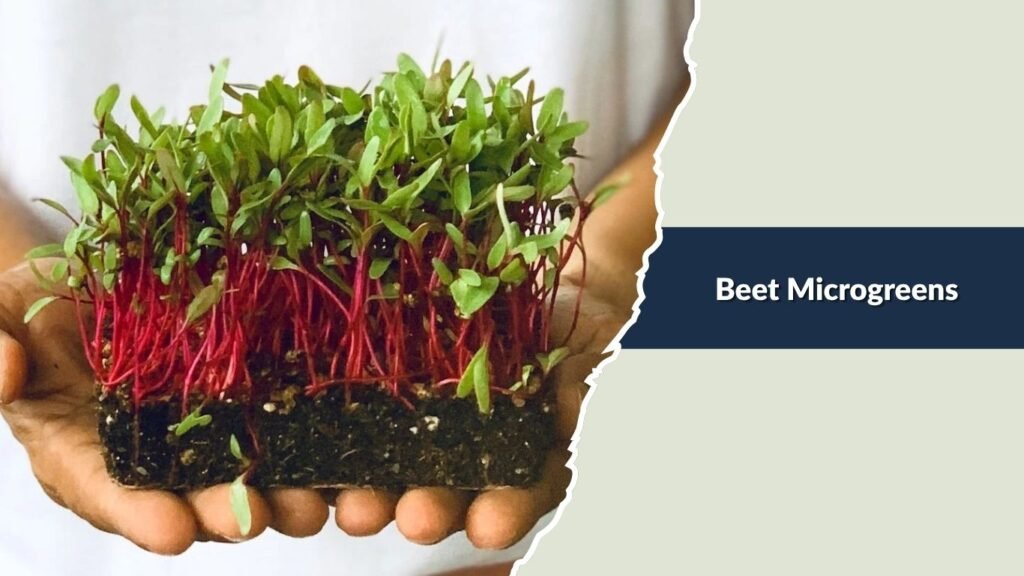
Beet microgreens are among the most attractive microgreens for beginners because they produce vibrant red stems, delicate green leaves, and a mild, earthy flavor. These colorful greens add visual appeal to salads, sandwiches, and fresh vegetable dishes while providing valuable nutrients, including vitamins and minerals. Beet microgreens grow successfully indoors with basic gardening supplies, although they generally require more time to germinate than faster-growing varieties such as radish or broccoli. They typically become ready for harvesting within 12–20 days, depending on temperature and growing conditions. Their beautiful appearance and pleasant flavor make them a rewarding addition to any indoor microgreen garden.
How to Grow Beet Microgreens Indoors
Begin by selecting untreated beet seeds intended for edible microgreen production. Soak the seeds in clean water for approximately 4–8 hours to help soften their tough outer seed coverings. Fill a shallow growing tray with 1–2 inches of moist seed-starting mix or coco coir. Spread the soaked seeds evenly across the surface, avoiding excessive overcrowding. Lightly press the seeds into the growing medium and cover them with a thin layer of additional medium if desired. Keep the tray covered for approximately 3–5 days while germination begins. Once the seedlings emerge, remove the cover and place the tray near a bright window or beneath an LED grow light. Maintain consistent moisture and good airflow to encourage healthy development.
Ideal Growing Conditions
- Light: Provide approximately 12–16 hours of bright light daily using an LED grow light or a suitable sunny window.
- Temperature: Maintain temperatures between 65–75°F (18–24°C) for consistent growth.
- Watering: Keep the growing medium evenly moist without allowing excess water to accumulate.
- Growing Medium: Use lightweight seed-starting mix or well-draining coco coir.
- Germination Time: Beet seeds typically germinate within 4–8 days under suitable conditions.
- Harvesting Time: Beet microgreens are generally ready to harvest within 12–20 days after sowing.
Harvesting and Maintenance Tips
Harvest beet microgreens when they reach approximately 2–3 inches tall and develop healthy green leaves with colorful red stems. Use clean, sharp scissors to cut the stems just above the growing medium. Avoid pulling the seedlings out by their roots to keep the harvested greens clean. Maintain adequate airflow and avoid overwatering because excessive moisture can encourage mold development. Provide consistent lighting to support strong stems and vibrant coloration. Beet microgreens may grow unevenly, so harvest the tallest seedlings first if necessary. After harvesting, rinse the greens gently, dry them thoroughly, and store them in a clean container in the refrigerator. Their mild, earthy flavor makes them perfect for salads, sandwiches, wraps, and colorful vegetable bowls.
14. Kohlrabi Microgreens
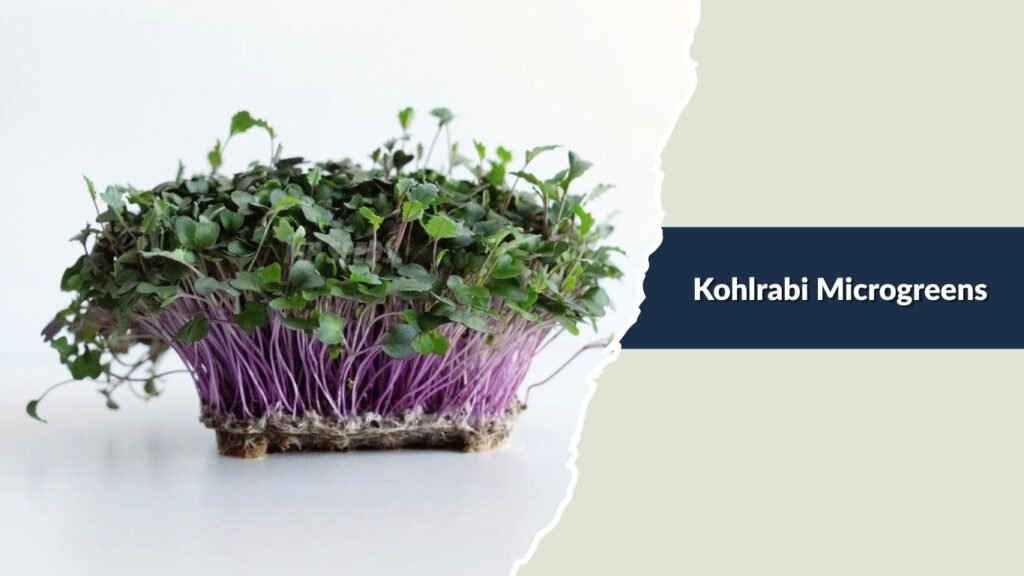
Kohlrabi microgreens are among the best microgreens for beginners because they grow quickly, require minimal maintenance, and produce attractive, nutritious greens. These delicate plants feature bright green leaves, slender stems, and a mild, slightly sweet flavor similar to cabbage and broccoli. Purple kohlrabi varieties develop beautiful violet-colored stems, making them especially appealing in salads and fresh dishes. Kohlrabi microgreens contain valuable nutrients, including vitamins C and K, along with beneficial plant compounds. They grow successfully indoors throughout the year and typically become ready for harvesting within 8–12 days, making them an excellent choice for first-time indoor gardeners.
How to Grow Kohlrabi Microgreens Indoors
Start by preparing a shallow growing tray filled with approximately 1–2 inches of moist seed-starting mix or coco coir. Sprinkle untreated kohlrabi seeds evenly across the surface, avoiding excessive overcrowding. Kohlrabi seeds generally do not require soaking before planting. Gently mist the seeds with clean water and cover the tray for approximately 2–3 days to encourage germination. Once the seedlings begin emerging, remove the cover and place the tray near a bright window or beneath an LED grow light. Maintain consistent moisture and provide adequate air circulation throughout the growing process. Under suitable conditions, kohlrabi microgreens develop tender stems and attractive leaves that are ready for harvesting within a short period.
Ideal Growing Conditions
- Light: Provide approximately 12–16 hours of bright light daily using an LED grow light or a suitable sunny window.
- Temperature: Maintain temperatures between 60–75°F (16–24°C) for healthy growth.
- Watering: Keep the growing medium consistently moist without allowing excess water to accumulate.
- Growing Medium: Use lightweight seed-starting soil or well-draining coco coir.
- Germination Time: Kohlrabi seeds typically germinate within 2–4 days under favorable conditions.
- Harvesting Time: Kohlrabi microgreens are generally ready to harvest within 8–12 days after sowing.
Harvesting and Maintenance Tips
Harvest kohlrabi microgreens when they reach approximately 2–3 inches tall and their first seed leaves have fully opened. Use clean, sharp scissors to cut the stems slightly above the growing medium. Avoid pulling the seedlings from the tray because this can introduce soil particles into the harvested greens. Water gently from the bottom whenever possible to reduce excessive moisture around the leaves. Maintain good airflow and avoid overcrowding to minimize mold problems. After harvesting, rinse the greens if necessary, dry them thoroughly, and store them in a clean container in the refrigerator. Their mild flavor and crunchy texture make them delicious in salads, sandwiches, wraps, and fresh vegetable bowls.
15. Bok Choy Microgreens
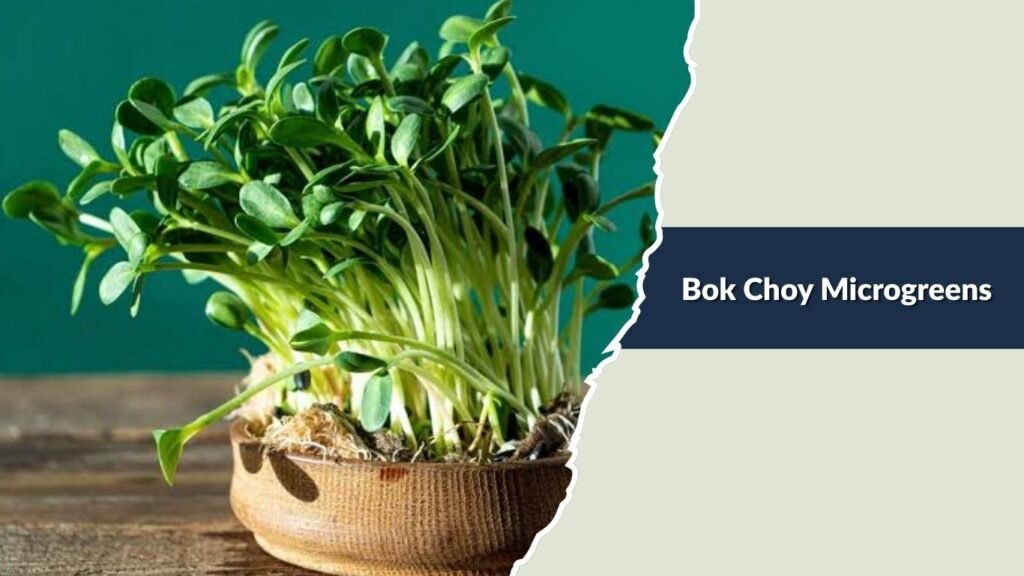
Bok choy microgreens are an excellent choice for beginners because they grow rapidly, require little space, and provide a flavorful harvest. These tender greens feature small, rounded leaves, delicate stems, and a mild, slightly sweet cabbage-like flavor. They contain important nutrients, including vitamins A, C, and K, along with naturally occurring antioxidants. Bok choy microgreens are particularly suitable for indoor gardening because they thrive in shallow trays and do not require complicated growing equipment. They generally become ready for harvesting within 8–12 days, making them a rewarding option for beginners who want to grow fresh, nutritious greens at home.
How to Grow Bok Choy Microgreens Indoors
Begin by filling a shallow growing tray with approximately 1–2 inches of moist seed-starting mix or coco coir. Spread untreated bok choy seeds evenly across the surface, leaving enough space to prevent excessive overcrowding. Bok choy seeds generally do not require soaking before planting. Gently mist the seeds with clean water and cover the tray for approximately 2–3 days to encourage germination. Once the seedlings begin sprouting, remove the cover and position the tray near a bright window or beneath an LED grow light. Maintain consistent moisture and adequate airflow throughout the growing period. Under favorable conditions, bok choy microgreens develop attractive green leaves and tender stems that are ready for harvesting within a short time.
Ideal Growing Conditions
- Light: Provide approximately 12–16 hours of bright light daily using an LED grow light or a suitable sunny window.
- Temperature: Maintain temperatures between 60–75°F (16–24°C) for consistent growth.
- Watering: Keep the growing medium evenly moist without creating waterlogged conditions.
- Growing Medium: Use lightweight seed-starting mix or well-draining coco coir.
- Germination Time: Bok choy seeds typically germinate within 2–4 days under suitable conditions.
- Harvesting Time: Bok choy microgreens are generally ready for harvesting within 8–12 days after sowing.
Harvesting and Maintenance Tips
Harvest bok choy microgreens when they reach approximately 2–3 inches tall and their first seed leaves are fully developed. Use clean, sharp scissors to cut the stems just above the growing medium. Avoid pulling the plants out by their roots to keep the harvested greens free from soil particles. Water from the bottom whenever possible to reduce excess moisture on the leaves and minimize mold problems. Provide consistent lighting to encourage compact, healthy growth and prevent weak, elongated stems. After harvesting, gently rinse the greens if necessary, dry them thoroughly, and refrigerate them promptly in a clean container. Their mild, refreshing flavor makes them an excellent addition to salads, sandwiches, wraps, and Asian-inspired vegetable dishes.
16. Chia Microgreens
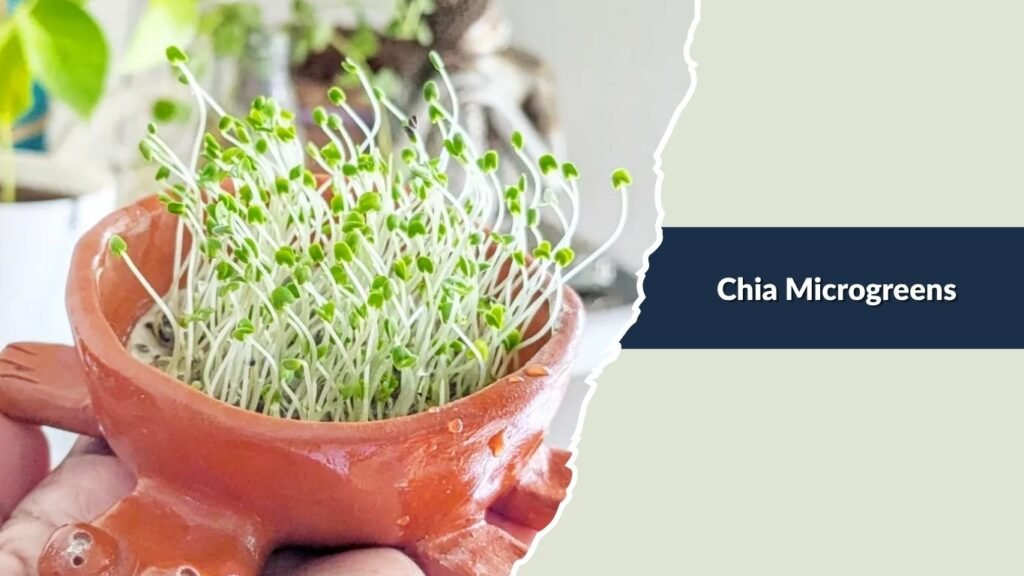
Chia microgreens are among the best microgreens for beginners because they grow quickly, require minimal space, and produce tender, nutritious greens. These delicate plants feature slender stems, small green leaves, and a mild, slightly earthy flavor. They contain beneficial nutrients, including vitamins, minerals, and naturally occurring antioxidants. Chia microgreens are particularly suitable for indoor gardening because they grow well in shallow trays without complicated equipment. Unlike many larger microgreen seeds, chia seeds develop a gel-like coating when exposed to water. They typically become ready for harvesting within 10–14 days, making them a rewarding choice for beginners.
How to Grow Chia Microgreens Indoors
Start by preparing a shallow growing tray filled with approximately 1–2 inches of moist seed-starting mix or coco coir. Sprinkle untreated, food-grade chia seeds evenly across the surface, avoiding excessive overcrowding. Chia seeds do not require soaking before planting because they absorb water quickly and develop a gelatinous coating. Gently mist the seeds with clean water and keep the tray in a warm location with indirect light during early germination. Once the seedlings begin emerging, place the tray near a bright window or beneath an LED grow light. Maintain consistent moisture without oversaturating the growing medium. Proper airflow helps prevent mold and supports healthy seedling development.
Ideal Growing Conditions
- Light: Provide approximately 12–16 hours of bright light daily using an LED grow light or a suitable sunny window.
- Temperature: Maintain temperatures between 65–75°F (18–24°C) for healthy growth.
- Watering: Keep the growing medium consistently moist without allowing standing water.
- Growing Medium: Use lightweight seed-starting soil, coco coir, or a suitable microgreen growing mat.
- Germination Time: Chia seeds typically germinate within 2–4 days under favorable conditions.
- Harvesting Time: Chia microgreens are generally ready to harvest within 10–14 days after sowing.
Harvesting and Maintenance Tips
Harvest chia microgreens when they reach approximately 2–3 inches tall and their first seed leaves have fully opened. Use clean, sharp scissors to cut the stems slightly above the growing medium. Avoid pulling the seedlings from the tray because this can introduce growing medium into the harvested greens. Water gently from the bottom whenever possible to prevent excessive moisture around the delicate stems. Maintain good airflow and avoid overcrowding to reduce the risk of mold development. After harvesting, rinse the greens if necessary, dry them thoroughly, and store them in a clean container in the refrigerator. Their mild flavor makes them suitable for salads, sandwiches, wraps, and fresh vegetable bowls.
17. Turnip Microgreens
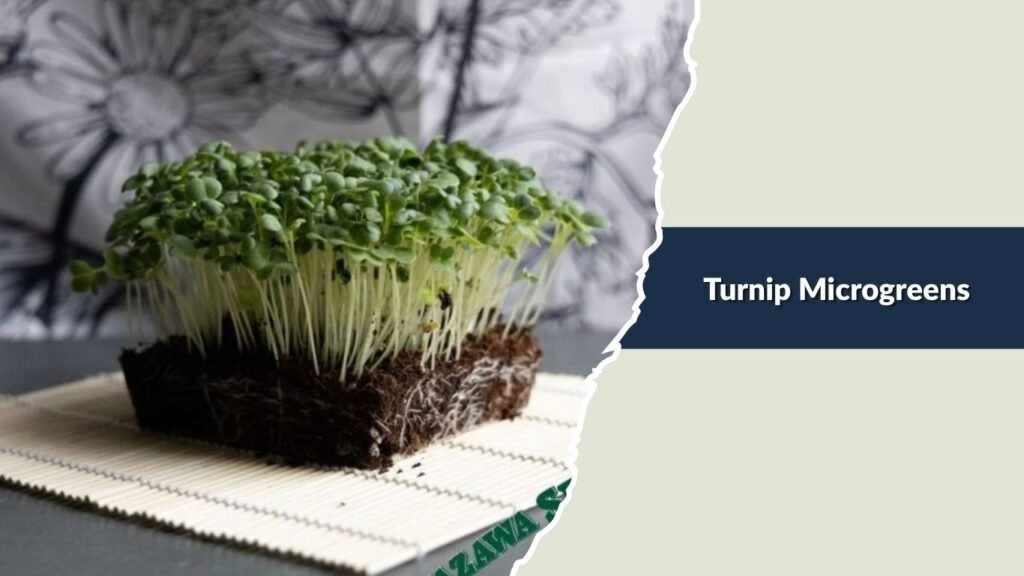
Turnip microgreens are an excellent choice for beginners because they grow rapidly, require little maintenance, and provide a fresh, flavorful harvest. These tender greens feature small green leaves, slender stems, and a mildly peppery flavor similar to mature turnip greens. They contain valuable nutrients, including vitamins A, C, and K, along with beneficial plant compounds. Turnip microgreens are particularly suitable for indoor growing because their small seeds germinate quickly and develop well in shallow trays. They generally become ready for harvesting within 7–12 days, making them a convenient option for beginners interested in growing nutritious greens at home.
How to Grow Turnip Microgreens Indoors
Begin by filling a shallow growing tray with approximately 1–2 inches of moist seed-starting mix or coco coir. Spread untreated turnip seeds evenly across the surface, leaving enough space to prevent excessive overcrowding. Turnip seeds generally do not require soaking before planting. Gently mist the seeds with clean water and cover the tray for approximately 2–3 days to encourage germination. Once the seedlings begin sprouting, remove the cover and place the tray near a bright window or beneath an LED grow light. Maintain consistent moisture and adequate airflow throughout the growing process. Under favorable conditions, turnip microgreens develop healthy green leaves and tender stems suitable for harvesting.
Ideal Growing Conditions
- Light: Provide approximately 12–16 hours of bright light daily using an LED grow light or a suitable sunny window.
- Temperature: Maintain temperatures between 60–75°F (16–24°C) for consistent growth.
- Watering: Keep the growing medium evenly moist without creating waterlogged conditions.
- Growing Medium: Use lightweight seed-starting mix or well-draining coco coir.
- Germination Time: Turnip seeds typically germinate within 2–4 days under suitable conditions.
- Harvesting Time: Turnip microgreens are generally ready to harvest within 7–12 days after sowing.
Harvesting and Maintenance Tips
Harvest turnip microgreens when they reach approximately 2–3 inches tall and their first seed leaves are fully developed. Use clean, sharp scissors to cut the stems just above the growing medium. Avoid pulling the plants out by their roots to keep the harvested greens free from soil particles. Water from the bottom whenever possible to reduce excessive moisture around the leaves and minimize mold problems. Provide consistent lighting to encourage compact growth and prevent weak, elongated stems. After harvesting, gently rinse the greens if necessary, dry them thoroughly, and refrigerate them promptly in a clean container. Their mildly peppery flavor makes them a delicious addition to salads, sandwiches, wraps, and fresh vegetable dishes.
FAQs
1. What Are the Easiest Microgreens for Beginners to Grow?
Radish, broccoli, pea shoots, sunflower, and mustard microgreens are among the easiest varieties for beginners. They germinate quickly, require minimal maintenance, and grow successfully indoors with proper lighting, moisture, and airflow.
2. How Long Do Microgreens Take to Grow?
Most microgreens are ready to harvest within 7–14 days after planting. Fast-growing varieties like radish and mustard may be ready in about a week, while basil and beet microgreens can take 14–21 days, depending on growing conditions.
3. Can You Grow Microgreens Indoors Without Sunlight?
Yes, microgreens can grow indoors without direct sunlight when provided with artificial lighting. Full-spectrum LED grow lights are a popular option. Most varieties benefit from approximately 12–16 hours of light daily for healthy, compact growth.
4. What Is the Best Growing Medium for Microgreens?
Coco coir and lightweight seed-starting mixes are excellent growing mediums for beginners. They retain moisture while providing proper drainage and supporting healthy root development. Some microgreens also grow successfully on specialized growing mats.
5. Can You Regrow Microgreens After Cutting?
Most microgreens do not regrow effectively after harvesting. However, certain varieties, such as pea shoots and wheatgrass, may produce a second harvest if enough healthy growth remains. For consistent quality and better yields, starting a fresh tray is usually recommended.