
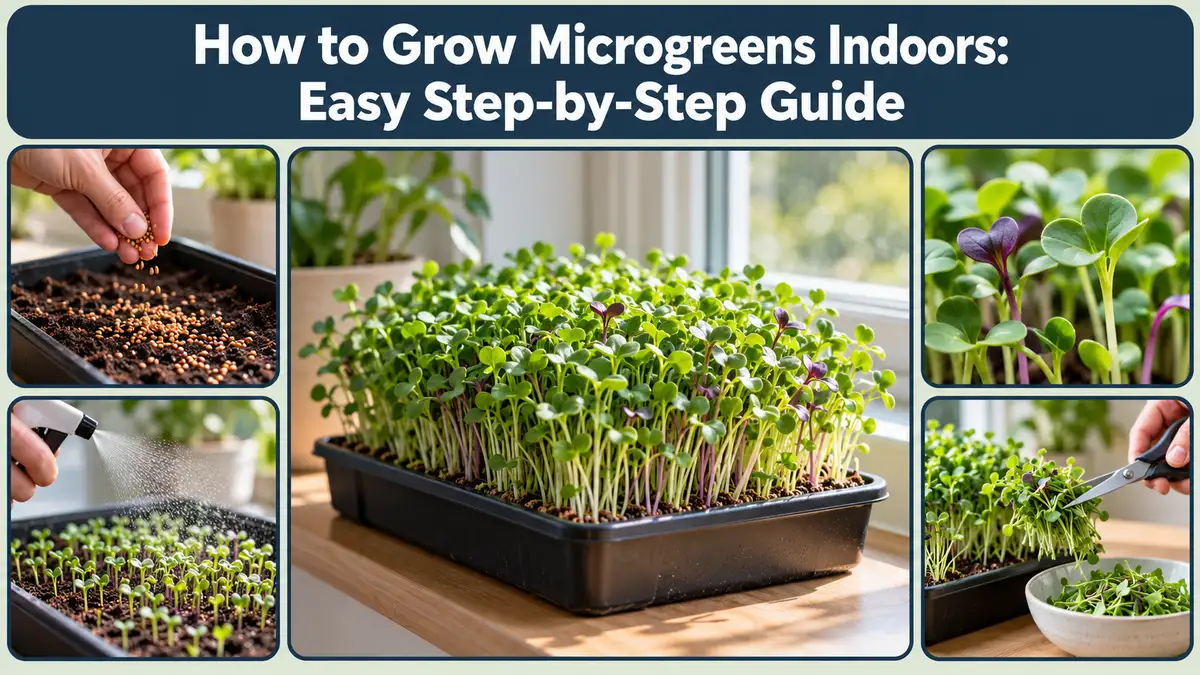
Growing fresh greens at home is simple when you know how to grow microgreens indoors using basic supplies and proper care. Microgreens are young vegetable and herb seedlings that grow quickly in small containers, making them perfect for kitchens, apartments, and limited spaces. Most varieties are ready to harvest within 7 to 21 days and require minimal maintenance. Whether you prefer growing microgreens in trays, without soil, or using water-based methods, this guide explains everything you need to successfully grow healthy, flavorful microgreens throughout the year.
What Are Microgreens and Why Grow Them Indoors?
Microgreens are young edible seedlings harvested after their first leaves develop, usually when they reach 2–3 inches tall. Unlike sprouts, microgreens are grown in a growing medium and harvested above their roots. Indoor growing allows you to control lighting, moisture, and temperature while producing fresh vegetables regardless of outdoor weather conditions.
Benefits of Growing Microgreens Indoors
- Fast harvesting: Most microgreens are ready within 7–21 days after planting.
- Space-saving: Small trays fit on countertops, shelves, and windowsills.
- Fresh nutrition: Microgreens contain vitamins, minerals, and beneficial plant compounds.
- Year-round production: Indoor conditions make continuous harvesting possible.
- Low maintenance: They generally need little fertilizer and basic daily attention.
Best Microgreens for Indoor Growing
Radish, broccoli, kale, arugula, mustard, and pea shoots are excellent choices for beginners. Radish microgreens germinate quickly and have a spicy flavor, while broccoli and kale offer mild tastes. Pea shoots produce larger, tender stems with a sweet flavor.
Choose seeds specifically intended for microgreen cultivation from reliable suppliers. Avoid chemically treated seeds and unsuitable plant varieties.
What Do You Need to Grow Microgreens Indoors?
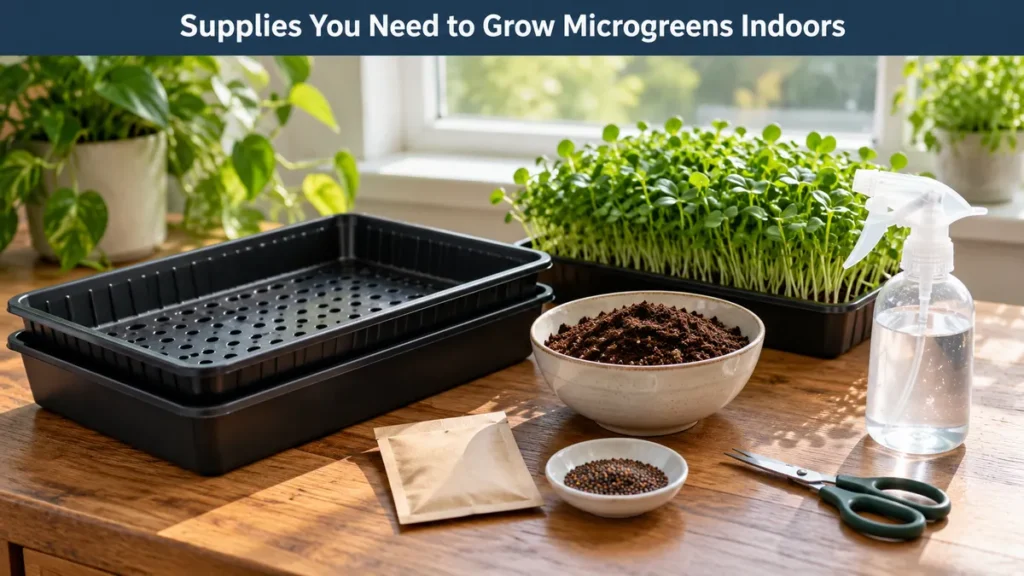
Growing microgreens indoors does not require expensive equipment or advanced gardening knowledge. A clean container, suitable seeds, growing medium, and reliable light source are usually enough to begin. Selecting the right materials helps maintain healthy root development, prevent excessive moisture, and encourage consistent germination throughout the growing process.
Essential Supplies for Growing Microgreens
- Microgreen seeds: Choose untreated seeds suitable for edible microgreens.
- Growing trays: Use shallow, food-safe trays with drainage holes.
- Growing medium: Select seed-starting mix, coconut coir, or suitable growing mats.
- Spray bottle: Useful for gently moistening seeds during germination.
- Grow lights: LED grow lights support growth when sunlight is insufficient.
- Water: Use clean, drinkable water for watering.
- Scissors: Sharp, clean scissors make harvesting easier.
Choosing the Right Indoor Growing Location
Place your trays near a bright window or beneath an LED grow light. A temperature around 65–75°F (18–24°C) is suitable for many varieties, although individual crops have different preferences.
Choose a clean location with gentle airflow and enough room for watering. Avoid placing trays directly beside heaters, air conditioners, or areas with frequent temperature changes.
How to Grow Microgreens Indoors in Trays
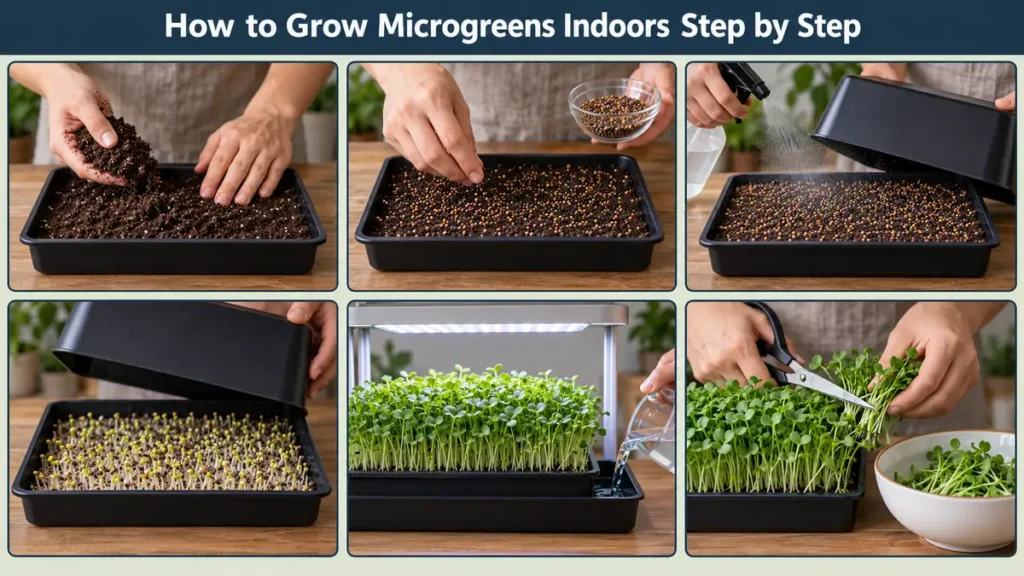
Growing microgreens indoors in trays is one of the easiest methods for beginners. Trays provide adequate growing space while making watering, seed distribution, and harvesting convenient. With the right setup, most common varieties develop healthy shoots within a couple of weeks. The following steps explain how to start a productive indoor microgreen garden.
Step 1: Prepare the Growing Tray
Select a shallow tray with drainage holes and place it inside a second tray without holes. Add approximately 1 inch of fresh seed-starting mix or coconut coir.
Spread the medium evenly without compacting it excessively. Lightly moisten it with clean water until damp but not waterlogged.
Step 2: Sow the Microgreen Seeds
Distribute seeds evenly across the growing surface. Seeds should be relatively close together without forming thick piles.
Gently press them into the medium to improve contact. Most small microgreen seeds do not require deep covering. Follow the seed supplier’s instructions for soaking larger seeds, such as peas.
Step 3: Encourage Seed Germination
Cover the tray loosely with a clean lid or another tray to maintain humidity. Many varieties germinate successfully during a brief covered period of approximately 2–4 days.
Inspect the seeds daily and maintain slight moisture. Remove the cover when seedlings are emerging and ready for light.
Step 4: Provide Light and Water
Move uncovered seedlings beneath a grow light or into sufficient natural light. Water carefully whenever the growing medium begins drying.
Bottom watering is particularly effective because it supplies moisture through drainage holes while keeping the delicate leaves relatively dry.
Step 5: Harvest Your Microgreens
Most microgreens become ready when their seed leaves are fully developed and their first true leaves begin appearing.
Use clean scissors to cut the stems just above the growing medium. Harvest only healthy seedlings, avoid disturbing the roots, and refrigerate harvested greens promptly.
How to Grow Microgreens Indoors Without Soil
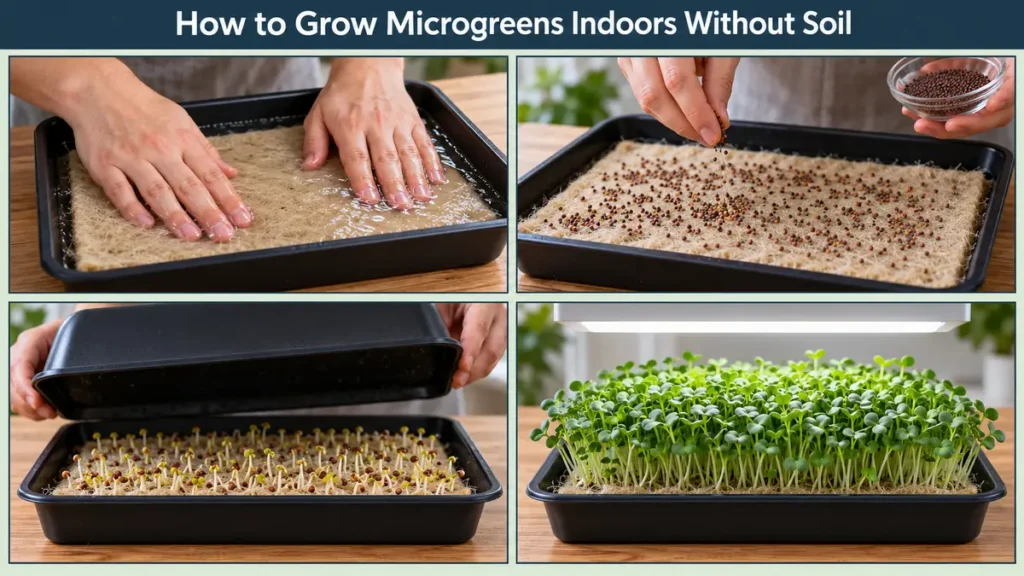
Soil-free microgreen growing is an alternative for people who prefer a cleaner indoor gardening setup. Instead of conventional potting mix, growers can use coconut coir, hemp mats, or other food-safe growing materials. These methods support root development while reducing loose soil around kitchen counters and harvesting areas.
Growing Microgreens Using Coconut Coir
Coconut coir is a lightweight growing material that absorbs and retains moisture. Place moistened coir inside a clean tray and spread microgreen seeds evenly across its surface. Maintain consistent moisture during germination and introduce adequate light after seedlings emerge. Coconut coir provides physical support for developing roots and works well for many common microgreen varieties.
Growing Microgreens Indoors in Water
Water-based microgreen growing typically uses a hydroponic mat or mesh-supported tray rather than planting seeds directly in standing water.Place seeds on a suitable food-safe growing surface and keep it evenly moist. As roots develop, they can access water beneath the support.Avoid submerging seeds and stems continuously because stagnant water encourages bacterial growth and root problems. Clean equipment and regular water management are essential.
How Much Light Do Microgreens Need Indoors?
Proper lighting is essential for growing strong, colorful microgreens indoors. Insufficient light produces pale seedlings with elongated, weak stems. Although natural sunlight can support growth, indoor grow lights offer more consistent results, particularly during cloudy weather or winter. The ideal setup depends on the variety, window exposure, and lighting equipment.
Growing Microgreens With Natural Sunlight
A bright south-facing window in the Northern Hemisphere often provides useful natural light. However, direct sunlight through glass can create excessive heat and dry the growing medium quickly.
Rotate trays occasionally to encourage even growth. If seedlings become thin, pale, or noticeably lean toward the window, additional lighting may be necessary.
Growing Microgreens With LED Grow Lights
LED grow lights provide reliable illumination without requiring extensive equipment. Aim for approximately 14–16 hours of light daily, followed by a dark period. Many suitable fixtures are positioned around 6–12 inches above the seedlings, depending on their intensity and manufacturer’s recommendations. Using an automatic timer maintains consistent lighting and makes indoor microgreen care more convenient.
How to Care for Microgreens Indoors
Microgreens require relatively little maintenance, but regular attention prevents common growing problems. Maintaining balanced moisture, adequate airflow, and a suitable temperature supports healthy seedlings. Because microgreens grow densely, excessive humidity can encourage mold and fungal diseases, making consistent environmental care particularly important throughout their short growing cycle.
Watering and Moisture Management
Check the growing medium daily and water whenever it begins feeling slightly dry. The goal is steady moisture without saturation.Bottom watering allows roots to absorb moisture while reducing contact between water and edible leaves. Empty remaining water from the lower tray after the medium absorbs enough moisture.
Preventing Mold and Yellow Leaves
Mold commonly develops when trays remain excessively wet or poorly ventilated. Provide gentle airflow, avoid overcrowding seeds, and remove germination covers promptly.Yellow seedlings may initially result from growing in darkness. They usually become green after receiving sufficient light. Persistent yellowing may indicate inadequate lighting or other growing problems.Discard trays showing obvious mold, rotting, or unusual odors rather than attempting to salvage contaminated greens.
How to Harvest and Store Indoor Microgreens
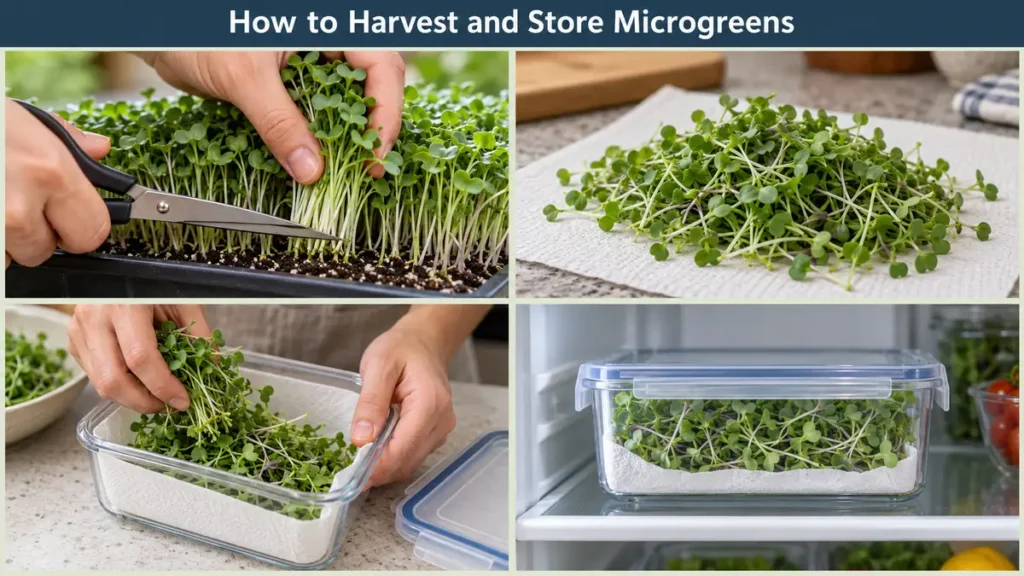
Harvesting microgreens at the correct stage improves flavor, appearance, and texture. Most varieties are ready within one to three weeks, although growing speed depends on the species and environmental conditions. Gentle handling is important because freshly harvested microgreens are delicate and lose quality quickly when exposed to excess moisture or warmth.
When Are Microgreens Ready to Harvest?
Microgreens are generally ready when they reach approximately 2–3 inches tall and develop expanded seed leaves or their first true leaves.Cut them above the growing medium using sanitized scissors. Avoid harvesting yellow, damaged, or unhealthy seedlings.
How to Store Fresh Microgreens
Place harvested microgreens in a clean, dry, food-safe container and refrigerate promptly. Excess surface moisture encourages spoilage, so avoid storing them soaking wet.Wash gently with clean water immediately before eating. Most varieties maintain better quality when consumed soon after harvest.
FAQs
1. Can You Grow Microgreens Indoors Without Sunlight?
Yes. Microgreens can grow indoors without natural sunlight when suitable LED grow lights provide adequate illumination. Around 14–16 hours of artificial light daily works well for many varieties.
2. How Long Does It Take to Grow Microgreens Indoors?
Most microgreens take approximately 7–21 days from planting to harvest. Fast-growing varieties such as radish and broccoli often mature earlier than slower-growing types.
3. Can You Grow Microgreens Indoors Without Soil?
Yes. Coconut coir, hemp mats, and other suitable growing substrates allow microgreens to develop without conventional soil. Clean growing materials and proper moisture management remain important.
4. How Often Should You Water Indoor Microgreens?
Check moisture daily and water whenever the growing medium starts drying. Watering frequency varies with temperature, humidity, tray size, and growing material. Avoid leaving roots in standing water.
5. Do Indoor Microgreens Grow Back After Cutting?
Most microgreens do not produce a worthwhile second harvest after cutting. Some varieties, particularly pea shoots, may regrow under suitable conditions, but fresh planting generally produces more reliable results.